You know the one… mix some glucose, sodium hydroxide and indigo carmine solutions together in a flask and get a nice deep yellow solution. Mix it up once and it will turn to red. Shake it up again and it turns green! Then simply let the flask settle and it will revert back to red and finally rest at yellow again. You can repeat the steps several times until the catalysts start to be eliminated through the reduction and oxidation processes that change the solution’s color.
We hope you enjoy the video and we’d appreciate it if you subscribed to our YouTube Channel or followed us on Twitter (@EvoluChem) so you get the latest updates as we continue to have a little fun with our photoreactors!
Full transcript of the video is below:
“OK, we wanted to have a little fun with this video and participate in Chemistry Twitter’s #FluorescenceFriday and demonstrate a photochemistry version of the well known traffic light experiment.
Now, we’re all familiar with traffic lights. It starts pretty early… as kids we’re fascinated by the three colors and the meanings behind them. Many of us spent some portion of our childhood playing the stoplight game. Then it continues into adulthood – at least for most of us – as we learn the rules of the road on our way to getting our first taste of freedom, our driver’s license.
In fact the green, yellow and red of the basic traffic light is so universal it’s no surprise that YouTube is filled with videos on how you can produce your own traffic light experiment using easily available chemicals. Just some basic sugar water, sodium hydroxide and indigo carmine in a flask will enable you to go from yellow, to red, to green – then back to red and yellow. Check out the links in the description if you want to try it at home.
Which got us to thinking… let’s do a version of the traffic light experiment with photochemistry. And then we realized…(record scratch)… we don’t know how to change a single solution into three different colors with an led light… but then we got an idea…
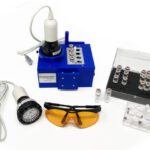
We have a photoreactor… specifically our very own PhotoRedOx Box… and we have some basic catalysts that will fluoresce the three primary colors of your standard traffic light.
This first catalyst is really just a control. It’s simply soapy water.
Our second catalyst is going to be our green. What is it? Good question… we forgot to write it down. But if you’re interested, let us know in the comments and we’ll figure it out.
The third catalyst is going to be our yellow. And the fourth and final catalyst will be our red.
We placed all of the catalysts into one of our vial holders and… look, I know what you’re thinking…(DUH) it’s pretty easy to tell which colors are going to be which… and you’re right… but we’re doing this for the lighting effect…
With the vial holder placed in the photoreactor we can turn the led on…
We’ll go through each one individually…
You can see the 4th catalyst is already in there and is kind of a purply red…
Our third catalyst is a strong yellow and you may recognize the glow from some of our other videos…
Finally we place the green in the vial and whoa… that is bright… sort of like those neon glow sticks you played with as a kid or at your last music festival… that green is eerily reminiscent of a movie from my childhood… ah, that’s right… careful Superman!
Anyway, thanks for watching our first contribution to #FluorescenceFriday. If you have any questions about what we did here today or have any other ideas for things you’d like to see in the future, please let us know in the comments or follow us on Twitter.”
[end transcript]